BlueStacks is a software application that enables you to install Android applications on your personal computer, so you can take advantage of your computer’s larger screen, faster processor, and better graphics.
Using Android Emulator, you can download and use the android apps on PC by using either the Google Play Store within the emulator or by sideloading APK files from a reliable online source.
BlueStacks is a lightweight, fast, and easy to use android emulator. You can play and use android games and other android apps on PC using BlueStacks Emulator.
In this guide, we'll quickly cover how to install & download BlueStacks on Windows.
How to Intall BlueStacks Emulator (A Quick Step-By-Step Guide)
1. To download BlueStacks Emulator, Visit BlueStacks official website from your PC.
2. To start downloading, press the Download button to save the setup file on your computer.

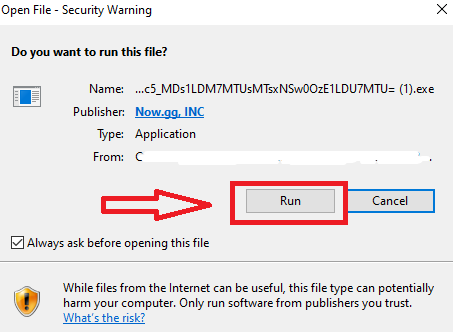
3. Open the downloaded file and the pop-up will appear on you screen, then press Run to continue.
4. Pop-up will appear on your screen where you need to give Windows Administrotor privilege to BlueStacks, press 'Yes' to continue.
5. Installation process will start after pressing 'Agree & Install'
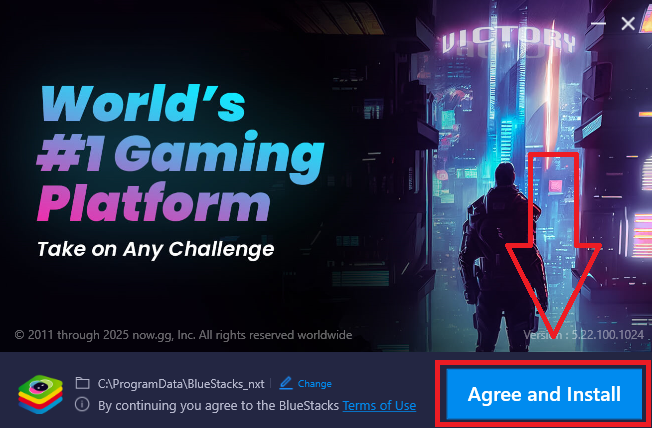
6. Wait for installation process to complete.
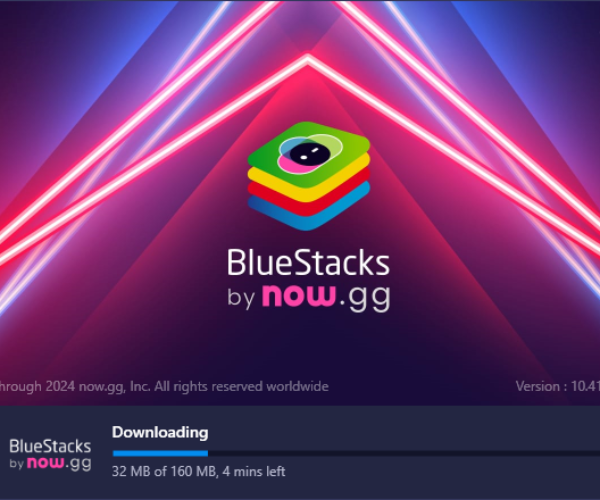
7. After completing the installation, BlueStacks will open automatically.
How to Use BlueStacks Emulator
You can use this emulator using either Google Play Store within the emulator or by sideloading APK files from a reliable online source.
To use the Play Store, you must log in with a Google account in an emulator that supports it, and for sideloading, you'll need to download an APK file and use a tool like the Android Debug Bridge (ADB) to install it on the emulator.
How to Install and Use APK File in BlueStacks
1. Download the APK file of the app you want from a trusted website.
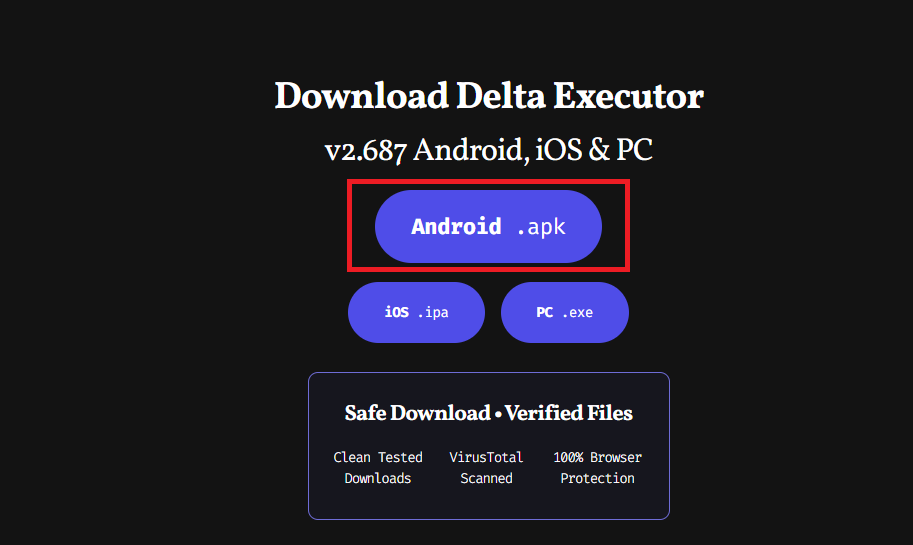
2. Now just open the BlueStacks and drag the downloaded APK file and drop it to the BlueStacks user interface.
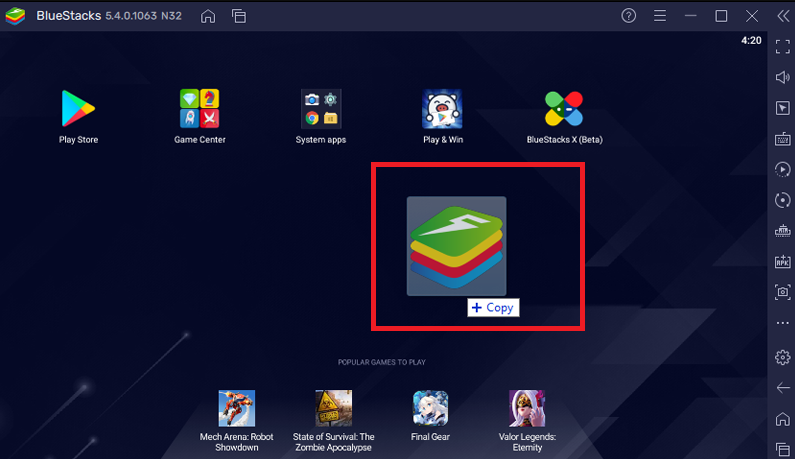
3. Wait for the installation to complete.
4. After installation, you can navigate it from BlueStacks home screen.
How to use Google Play Store in BlueStacks
1. After completely install and launch the BlueStacks Emulator, open it on your PC.
2. Search tab will appear in the home section, type the name of any android game there or open the Google Play Store within the emulator using your Gmail account.
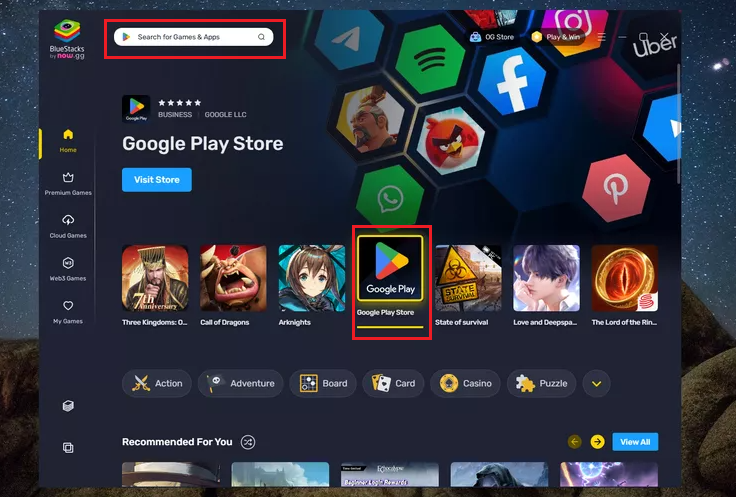
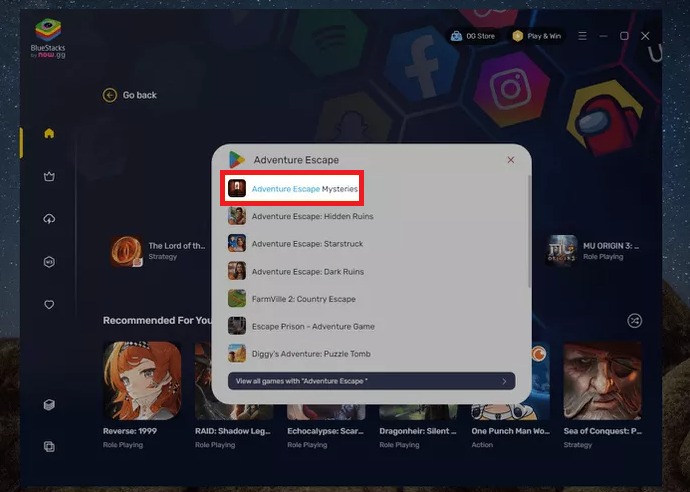
3. Search for the app you want and click on it to check the details.
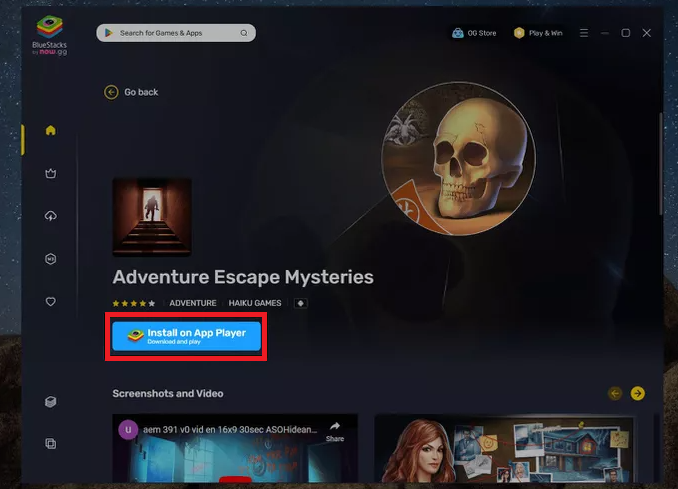
4. Details of android app will appear on the screen, press the button 'Install on App Player' and then press 'Install from Google Play' to proceed the installation.
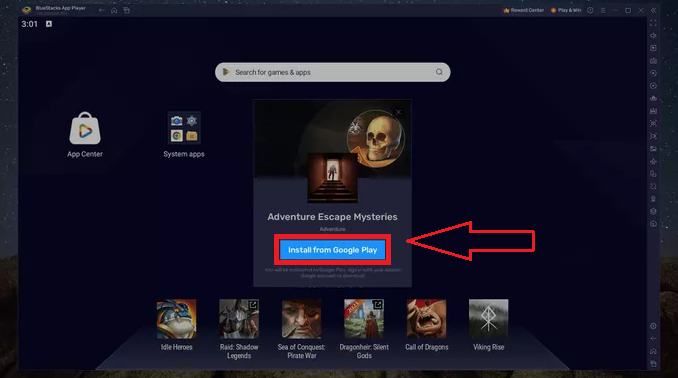
5. After this, you need to sign in with you Gmail Account on Google Play Store within the emulator.
6. When Sign in process is done and you logged in, you'll be able to install the apps using Google Play Store.
7. Press button 'Install' and wait for installation process
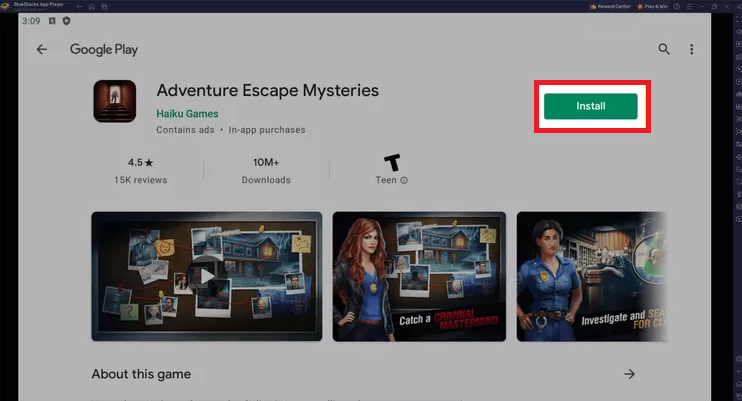
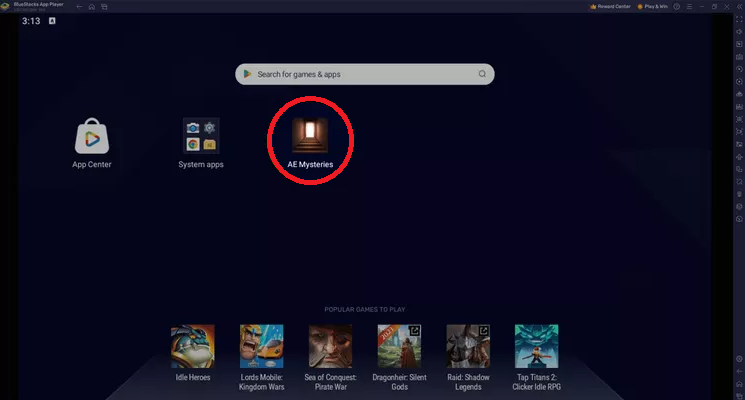
8. Once installed, the app will be available to use from the emulator's home screen and from 'My Games' tab
Minimum System Requirements for BlueStacks
Operating System
- Microsoft Windows 7 or higher.
- macOS users need macOS Sierra (10.12) or later (for BlueStacks on Mac).
Processor (CPU)
- Intel or AMD processor.
- At least Dual-Core with Virtualization Technology (Intel VT-x or AMD-V) enabled.
RAM
- Minimum 4 GB RAM (higher recommended).
Storage
- At least 5 GB free disk space.
- SSD recommended for faster performance.
Graphics
- Intel/NVIDIA/ATI onboard or dedicated graphics card.
- Updated DirectX 11 or higher.
- Graphics drivers should be up to date.
Other Requirements
- Administrator rights on your PC.
- Stable broadband internet connection for smooth app downloads and updates.
Recommended Specs for Best Performance (not just minimum):
- Windows 10/11 (64-bit).
- Intel i5 / AMD Ryzen 5 or higher.
- 8 GB RAM or more.
- SSD storage.
- Dedicated GPU (NVIDIA/AMD).
BlueStacks Failed to Install APK: How to Fix It
Installing APK files on BlueStacks usually works smoothly, but some users face errors such as “APK installation failed” or “Invalid APK file.” These issues often happen because of corrupted APKs, outdated BlueStacks versions, or compatibility problems.
If you’re struggling to install APKs on BlueStacks, try these proven fixes:
Method 1: Check APK Validity or Use the Invalid File Resolver
Sometimes the APK file itself is corrupted or incompatible. Make sure:
- The APK is downloaded from a reliable source.
- The file name ends with .apk and hasn’t been renamed.
BlueStacks also provides a tool called the Invalid File Resolver that helps fix APK installation issues. Download and install it to resolve file errors.
Method 2: Use the Rooted Version of BlueStacks (Advanced)
Some apps are designed to work only on rooted Android devices. If your APK falls into this category, you may need a rooted BlueStacks version.
Note: Rooted BlueStacks versions are unofficial and may pose security risks. Only proceed if you understand the risks and download from a trusted source.
Method 3: Reinstall or Update BlueStacks
If the above steps don’t help, your BlueStacks installation might be faulty or outdated. In this case:
- Uninstall BlueStacks completely.
- Download the latest version from the official BlueStacks website.
- Reinstall and try installing your APK again.
If none of these solutions work, the problem may lie in the APK file itself. Try downloading the APK again from a verified source or use an alternative Android emulator like NoxPlayer or LDPlayer.